It’s Windlace, not Windlass

It’s Windlace, not Windlass
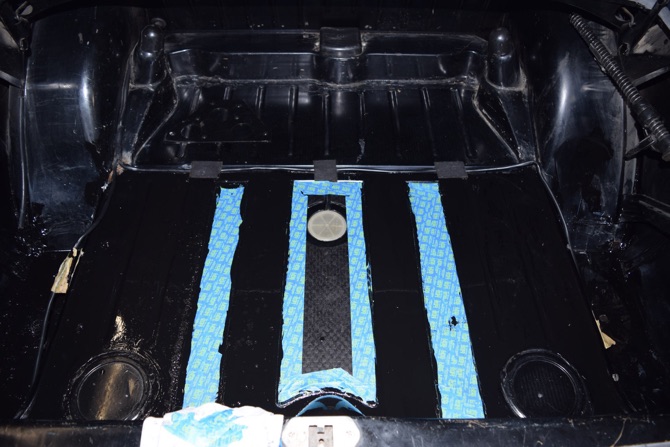
To follow up on my last entry, the POR-15 got applied to the trunk floor and it looks great! Here are some pictures of the floor before I removed the masking from the damping material.
And the fender wells on both sides.
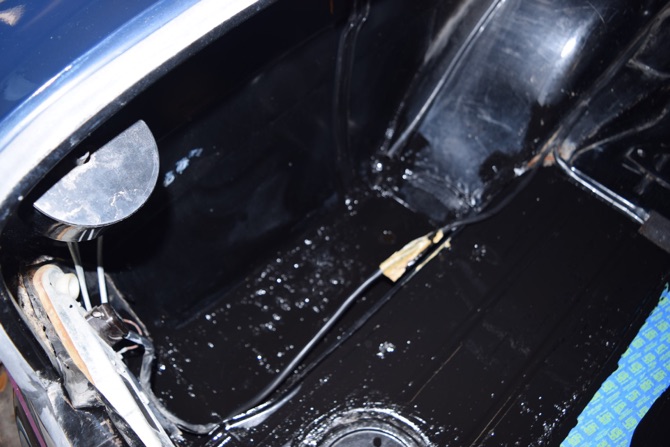
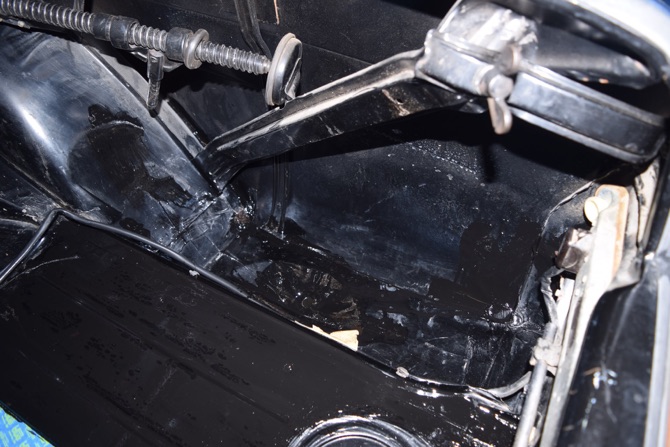
Now the surface rust that was lurking in these areas is treated and effectively gone. I installed the drain grommets in the fender wells and set about cleaning the plastic wire guides that cover the wiring harness on both sides. I’ll be installing them shortly.
And now on to today’s accomplishments....
One item of the interior I’ve been struggling with is the windlace. If you don’t know, windlace is the fabric or material that is typically placed over the pinch weld of the door opening and forms the transition between the interior upholstery and carpet and the door frame and exterior of the car. In some cars it’s fabric placed over a metal or plastic guide or form, such as in the W111 chassis cars (and its fellow models.) In later Mercedes’ it consists of fabric that is formed around a tube of foam that makes sort of a “T” shape, with the longer part of the “T” pressed into a groove in the door trim. It can also be a piece of rubber or foam in an inverted “U” shape with metal or wire inserts that give it shape and allow it to grip the pinch weld or other trim pieces around the door.
So now you’re enlightened.
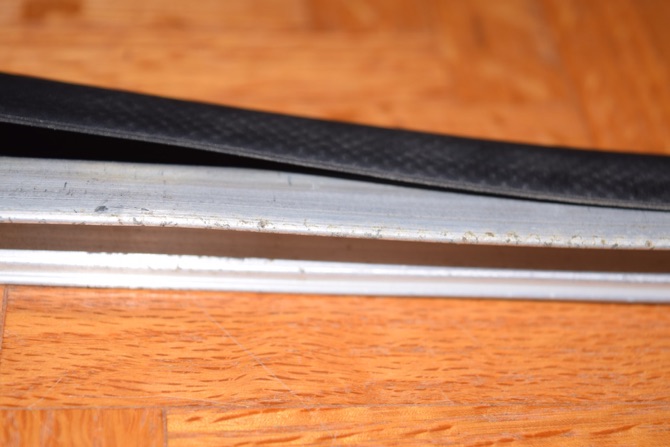
On my 220SEb, the windlace frame consists of an aluminum extrusion that has a “U” shape covered with a piece of rubber. The ends of the “U” have a slight hook or protrusion in them to hold the clips that allow it to “grab” the pinch weld. Here’s a picture of the two parts.
In the case of the windlace on my 220SEb, and that of many others of the same vintage, is that the fabric has deteriorated to the point where it’s disintegrating. On top of that, it’s badly faded, too. The correct windlace fabric from Mercedes is no longer available, nor is it something that can be sourced from third party sellers. I know of some pieces that German suppliers are offering that is new old stock, but it’s not in my color and it’s prohibitively expensive.
So I decided to make my own.
After an enlightening and helpful young lady at my local JoAnn Fabrics spent some time assisting me with finding a similar fabric, I brought a sample home and had at it. I’m no seamstress, but I can operate equipment and follow instructions pretty well, I think, so I dug out the sewing machine and had at it.
The fabric I decided on is a velour that’s much like the windlace in the W123 and W126 models. While this is a departure from the open weave fabric used in the W111, I think it looks better and will wear better, too. Unfortunately, I could not find a dark brown color that was as dark as the original, but I’ve got a way around that, too - more about that in a moment.
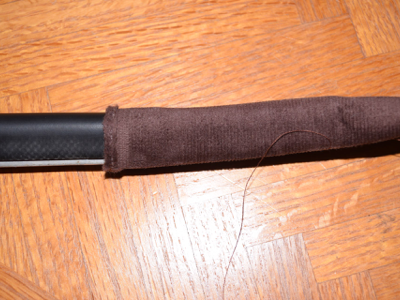
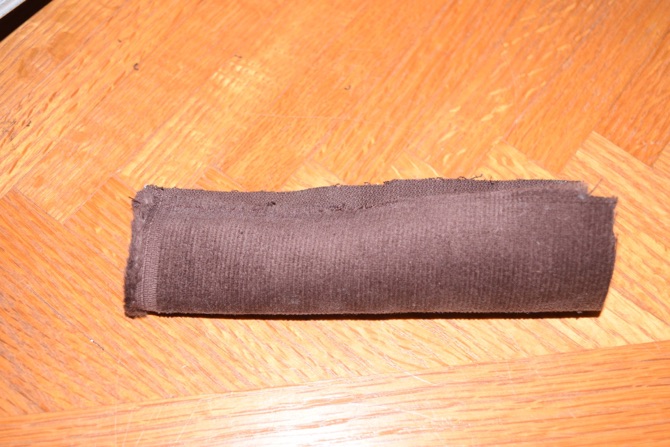
After removing some of the old fabric intact, I was able to determine that it consists of a fabric “tube” that is approximately 3” in circumference. I took some of my fabric and cut it to 3-1/4” wide so I would have room for the seam to join the edges. I stitched up the edges with my sewing machine and got this.
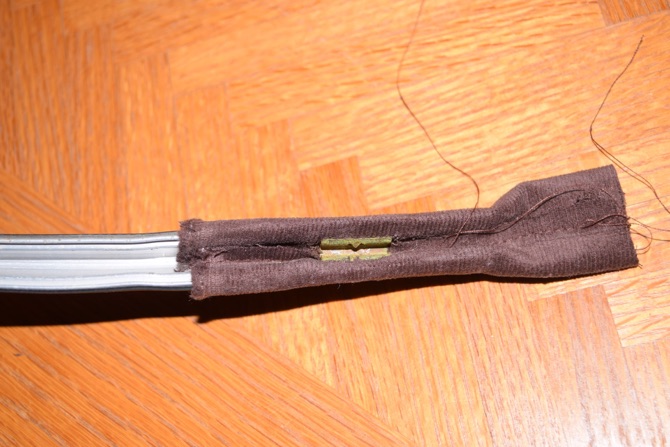
Since this is a test piece I didn’t pay attention to the fabric grain, which in the final product will run lengthwise, not at a right angle to the length of the windlace.
I slipped the tube of fabric over the windlace frame and inserted a clip. Success!
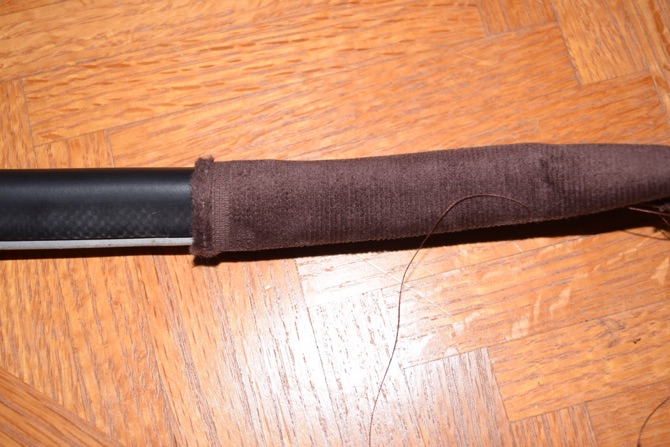
It turned out just as I had planned. With the clip in place there was just enough tension on the fabric to hold it tightly in place. I’ll consider my experiment a success.
And now about that color... someone on one of the forums I frequent suggested purchasing the remaining windlace fabric offered by a German supplier despite it being the wrong color, a very light off white or buff sort of tone, and dying it the correct color. While this was a good suggestion, it occurred to me that I could just as easily purchase the same type of fabric I did my experiment with, only in a light or white color, and use some fabric dye to dye it to the correct color to match the original windlace. I believe that is the approach I’ll take. I plan on tackling the whole windlace project in the next few weeks while the car is having its headliner replaced.
Tuesday, February 26, 2019