Back in the Swing of Things

Back in the Swing of Things
This is a bit late, as I finished up on Sunday around 9:00 pm.
Sunday I replaced the rear swing arm bushings and mounts, along with the lower spring pads. It was a bit of an ordeal.
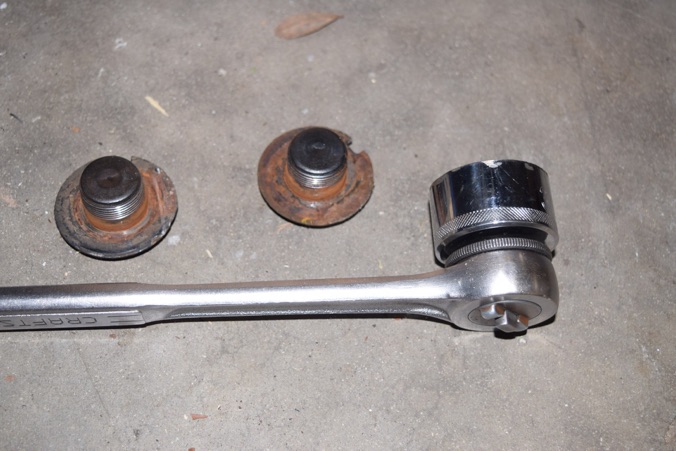
Why? Because the bolts that hold the bushings in place are very large and had not been moved in over 50 years. The inner bolts are fairly easy to get at with an impact wrench, which is a necessity. But - the outer bolts are in a very tight spot that only allows access with a ratchet or breaker bar.
Thanks to those who have gone before me, I learned that if I took a 36 mm socket and ground the sides down so that it was just deep enough for the bolt head I would have far better luck at getting good purchase on the bolts. I took their advice as well as liberally soaked the bolts with Kroil.
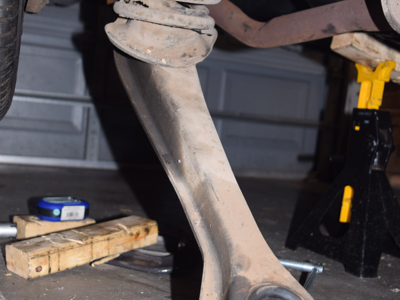
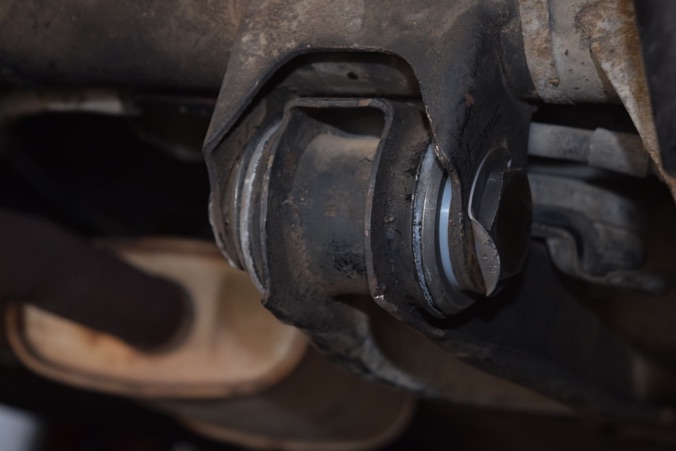
The right side outer bolt came off with a four foot breaker bar and a lot of force. But most importantly, it came out. Before I removed the bolts completely, I had to lower the control arm to relieve the pressure from the spring. That required that the front of the swing arm be removed as well. There’s a large nut holding the swing arm in place along with a cover plate that is bolted to the body of the car. Think about it like your forearm, with the elbow being the fixed point bolted to the car in front and your hand being wrapped around the bushings on the axle tubes. On top of your arm pretty much equidistant from each end is a large spring.
In order to release the spring, I had to remove the nut and cover plate on the front of the swing arm, then lower it slowly using my floor jack until it was lowered enough to allow the spring to extend its length.

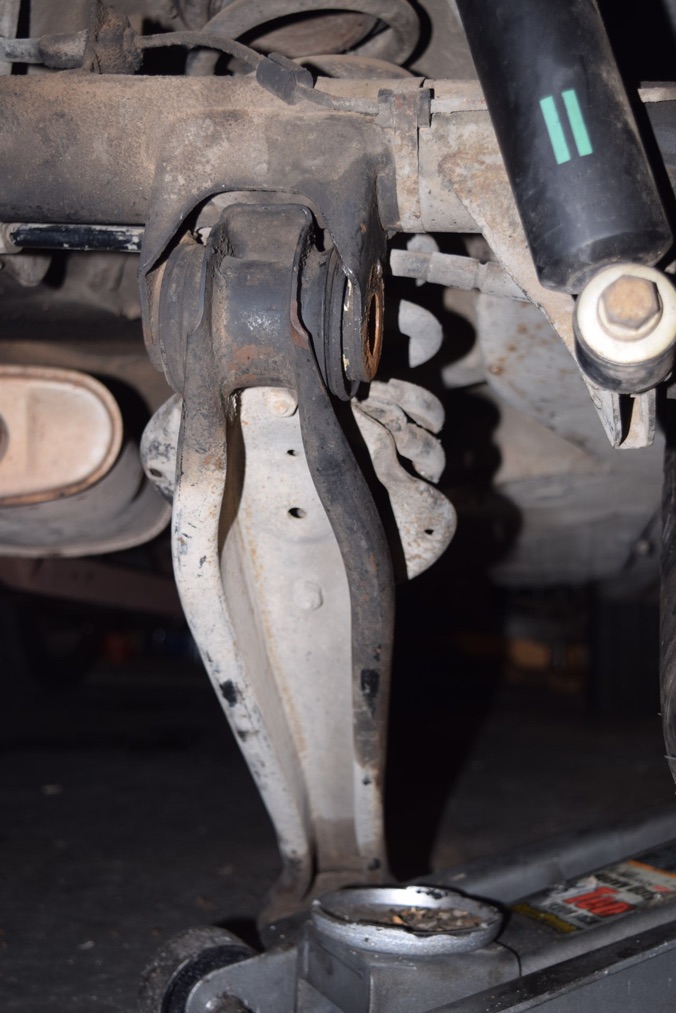
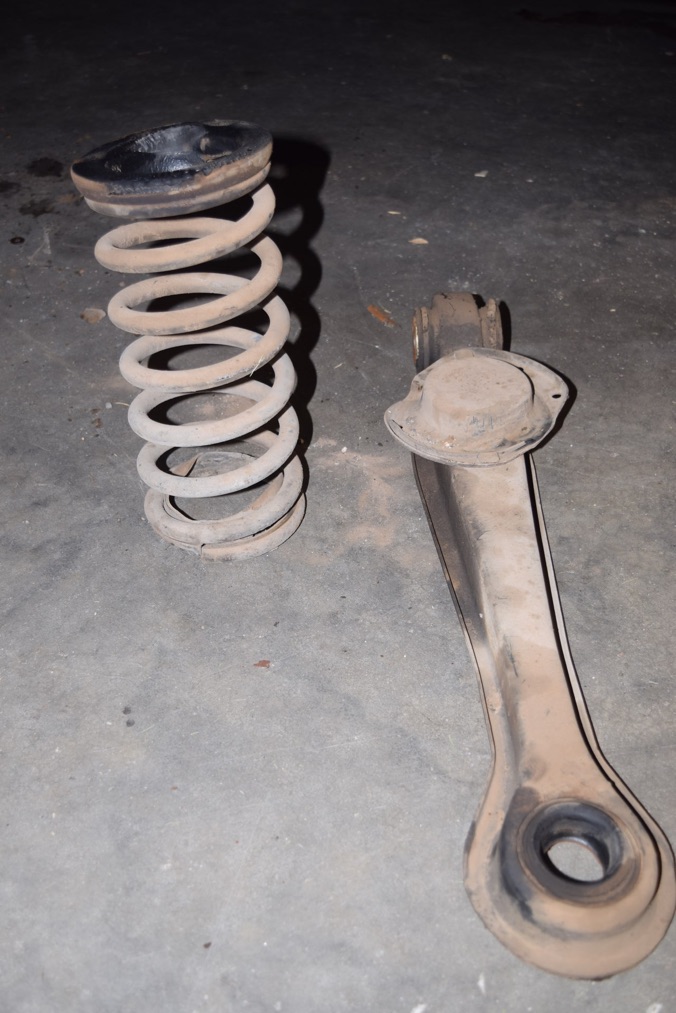
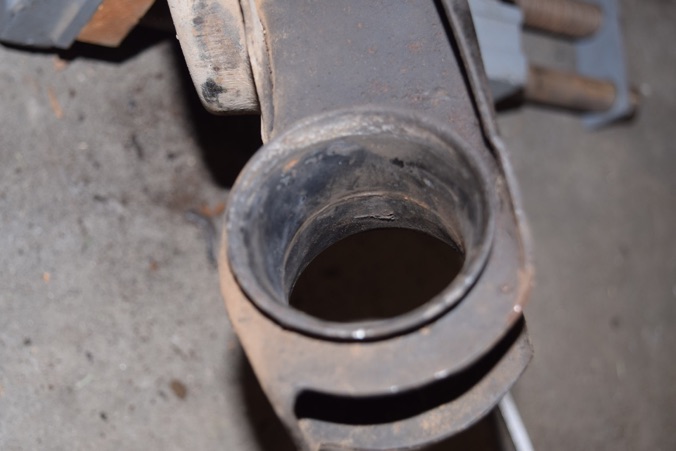
The swing arm pulls right out of the bracket on the axle tube with minimum effort. Here is it removed from the car along with the spring:
Here is the Mercedes kit for replacing the rear swing arm bushings:
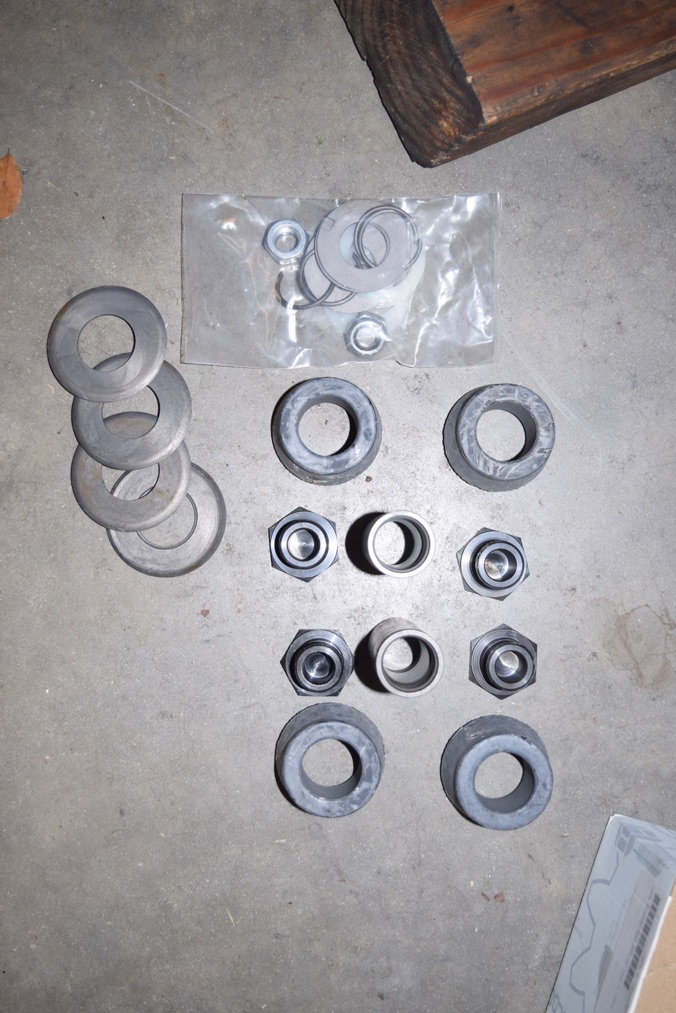
Four bushings, bolts, washers and retaining washers and retaining rings, two bushing tubes and new nuts for the front mounts. I also purchased new lower spring pads as well, since the originals pretty much disintegrated when the springs came out. Let the fun begin!
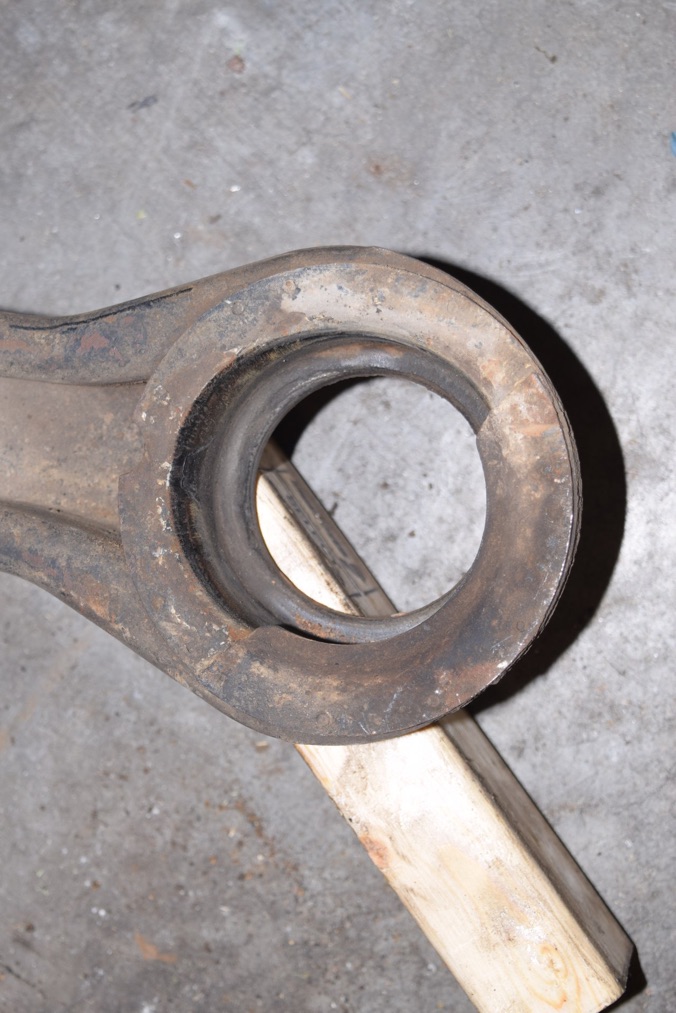
First, remove the old bushings and the bushing tube. Clean out the bore where the bushings go.
Next, remove the bushing on the front of the swing arm.
Install the new forward bushing.
Unfortunately, I didn’t get pictures of the bushings installed in the swing arms while they were off the car. Why? Because I spent probably an hour trying to set up a jig or fixture to compress the bushings so that I could install the retaining rings. The bushings are held in place with large washer and then a retaining ring that fits in a groove on the center tube. The bushings need to be compressed slightly to expose the groove for the retaining ring. I ended up using a bench vise and some pieces of hardware to compress the washer on one side and have access to the center tube so I could put the retaining ring in place. It was difficult and frustrating, to say the least.
Once done, the swing arm was ready to go back in place.
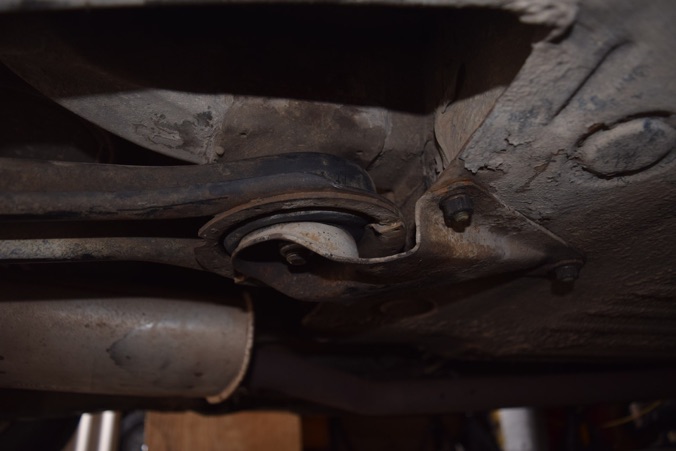
Doing the removal process in reverse, I placed the rear of the swing arm into the bracket on the axle tube and threaded the large bolts in by hand. The spring was placed on the new spring pad and over the large “cone” that centers the top of it. With the floor jack under the front of the swing arm, I raised it into place with the forward bushing going over the mounting cone it indexes into. Sounds easy, but it took a bit of wiggling and levering things around to get the front bushing lined up. A liberal application of dish soap helped the bushing to slip into place.
With this done the bracket could be bolted back into place and the large bolts on the rear bushings tightened and the locking washers peened over to hold the bolts in place.
And here’s what they look like installed.
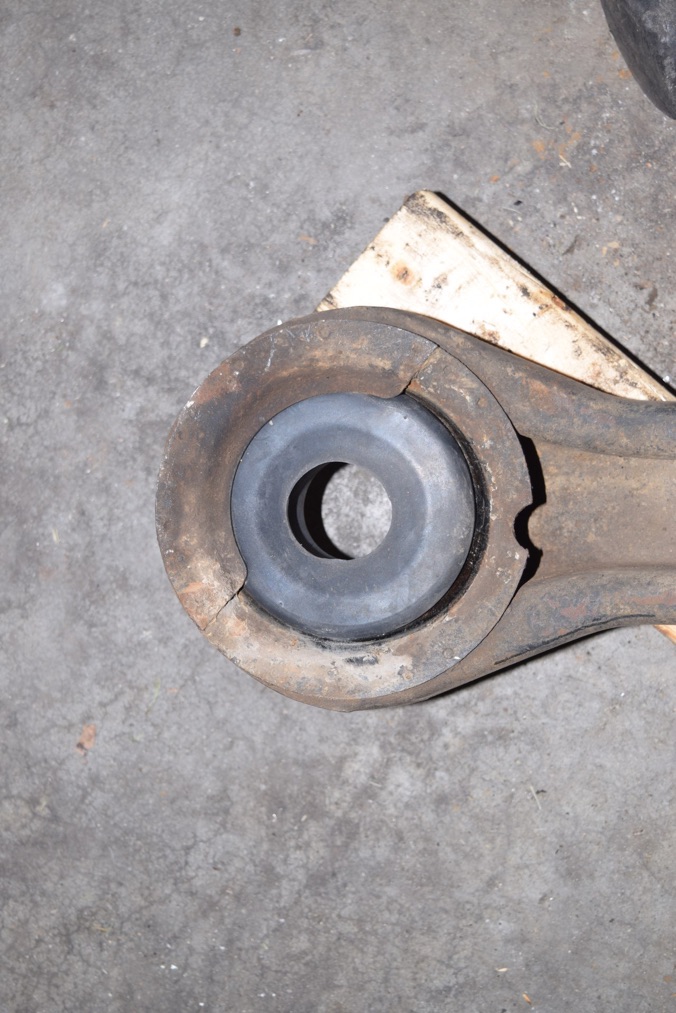
And the forward bushing.
So that pretty much wraps up the replacement of rubber bits in the suspension for the most part.
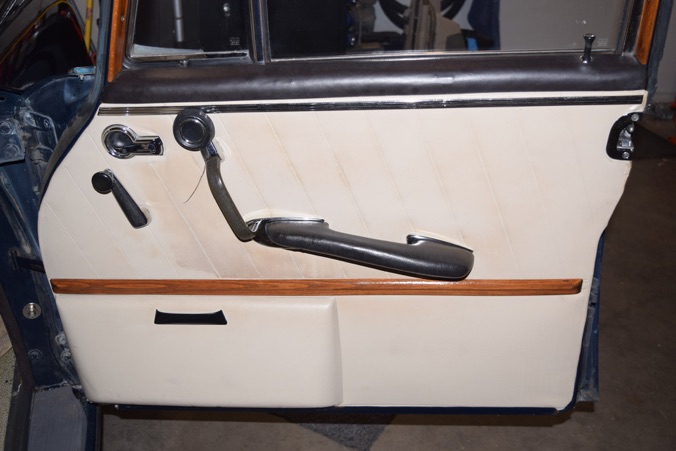
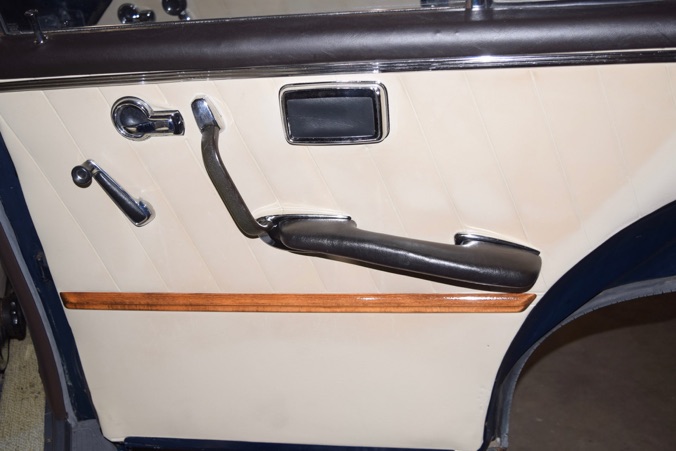
And I almost forgot - I installed the refinished wood trim strips on the right side doors.
Next will be the removal and refinishing of the wood strips on the left side doors, and the removal of the old firewall material and installation of new firewall material.
Tuesday, June 25, 2019